Creating an Invoice
Learn how to create an invoice in Teamleaf, made simple using information you've already added to the Task
Step-by-Step Guide
Finance
Invoicing
Step 1
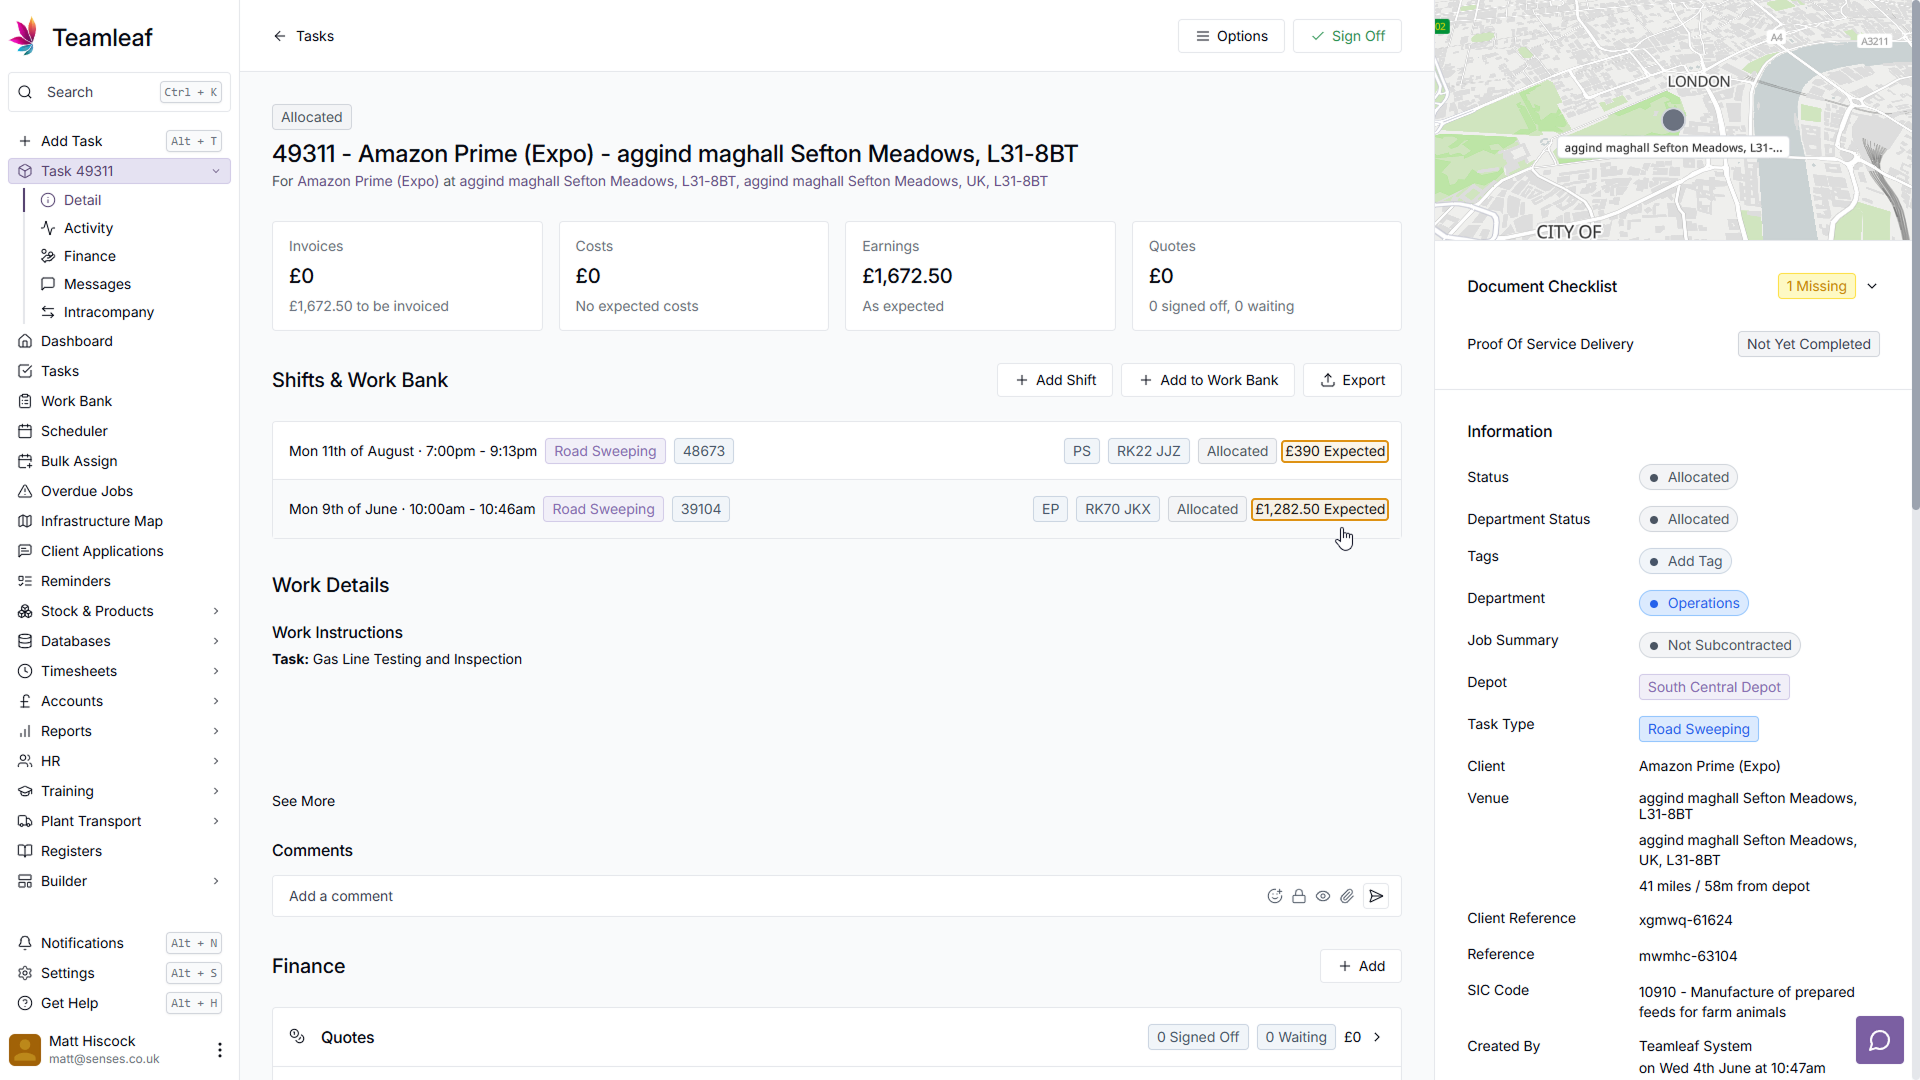
See Earnings
Before you create your invoice, you can see the earnings that can be added to the task by looking in the 'Shifts & Work Bank' section, or in the 'Finance' section
Step 2
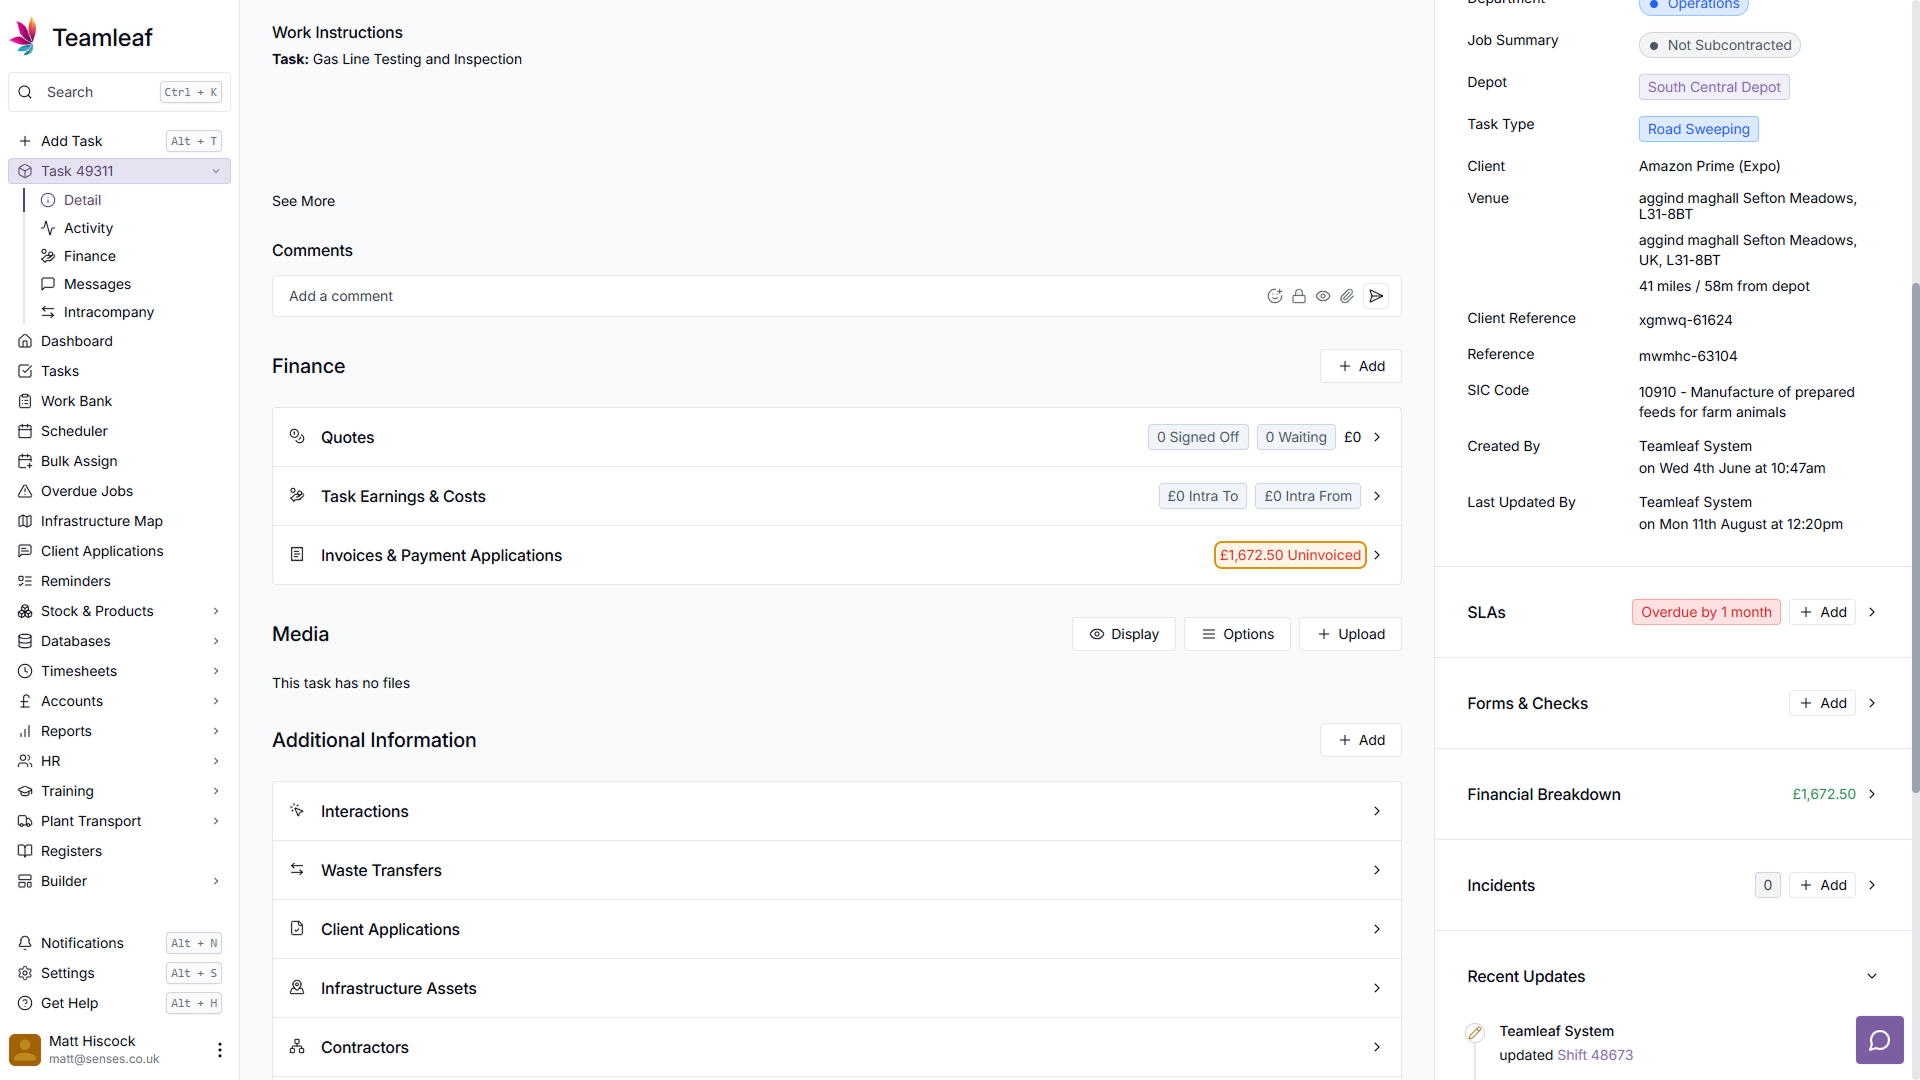
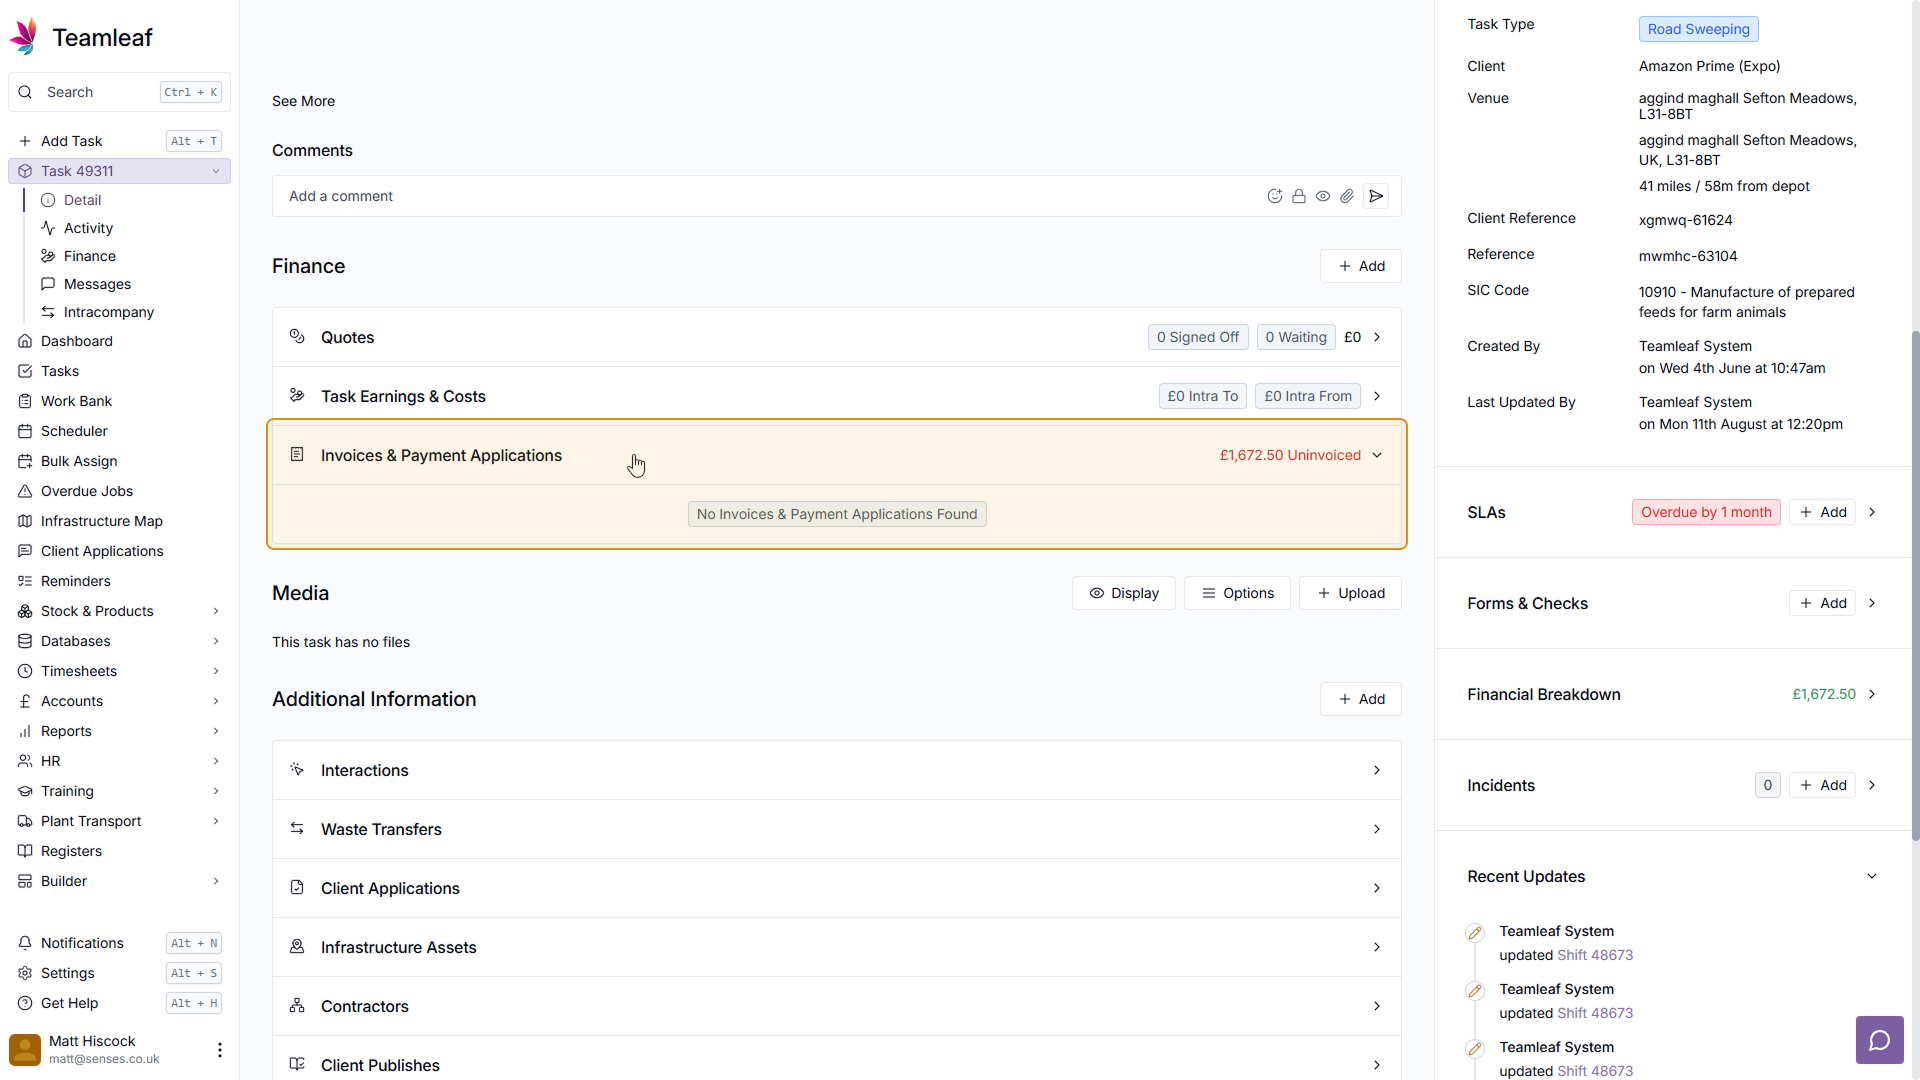
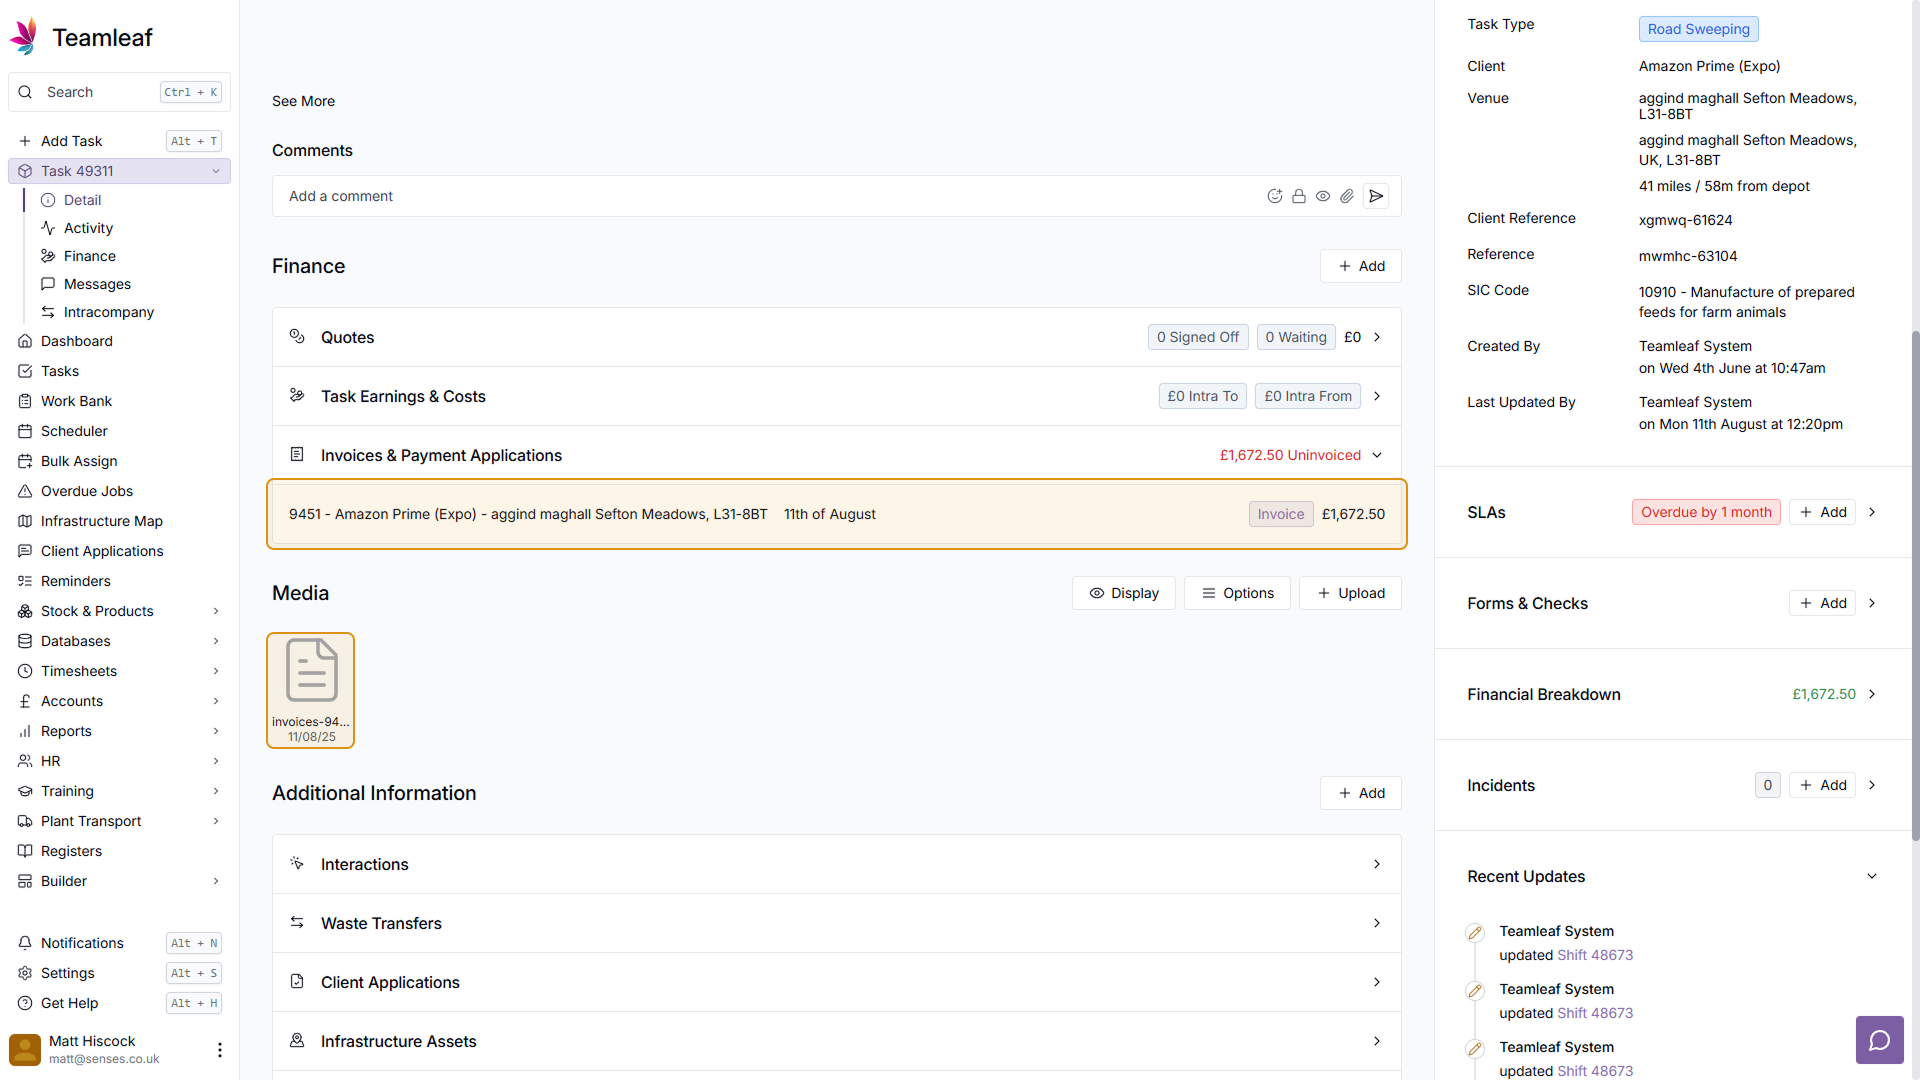
Invoiced and Uninvoiced
You can see how much is Invoiced or Uninvoiced in the 'Finance' section, on the 'Invoices & Payment Applications' row of the table. Click this row to see any Invoices or Payment Applications that have already been added to the Task
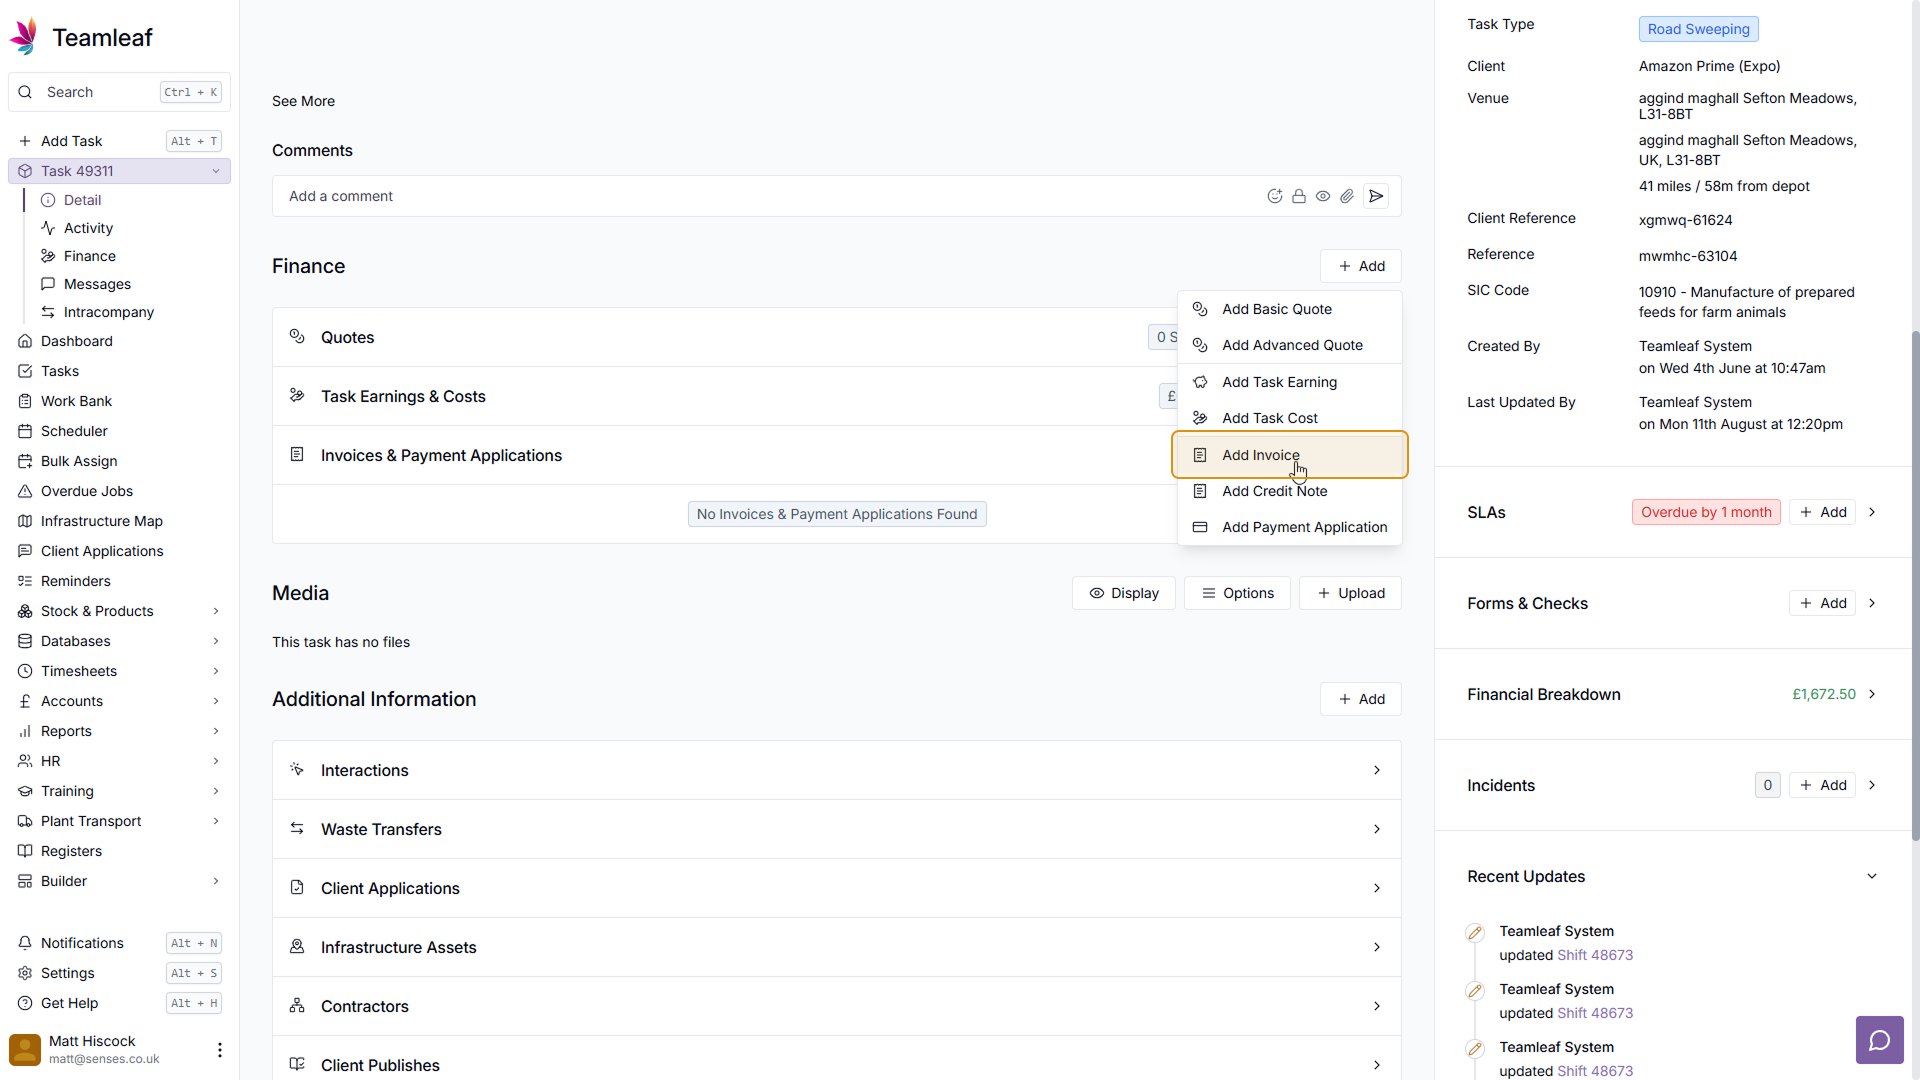
Step 3
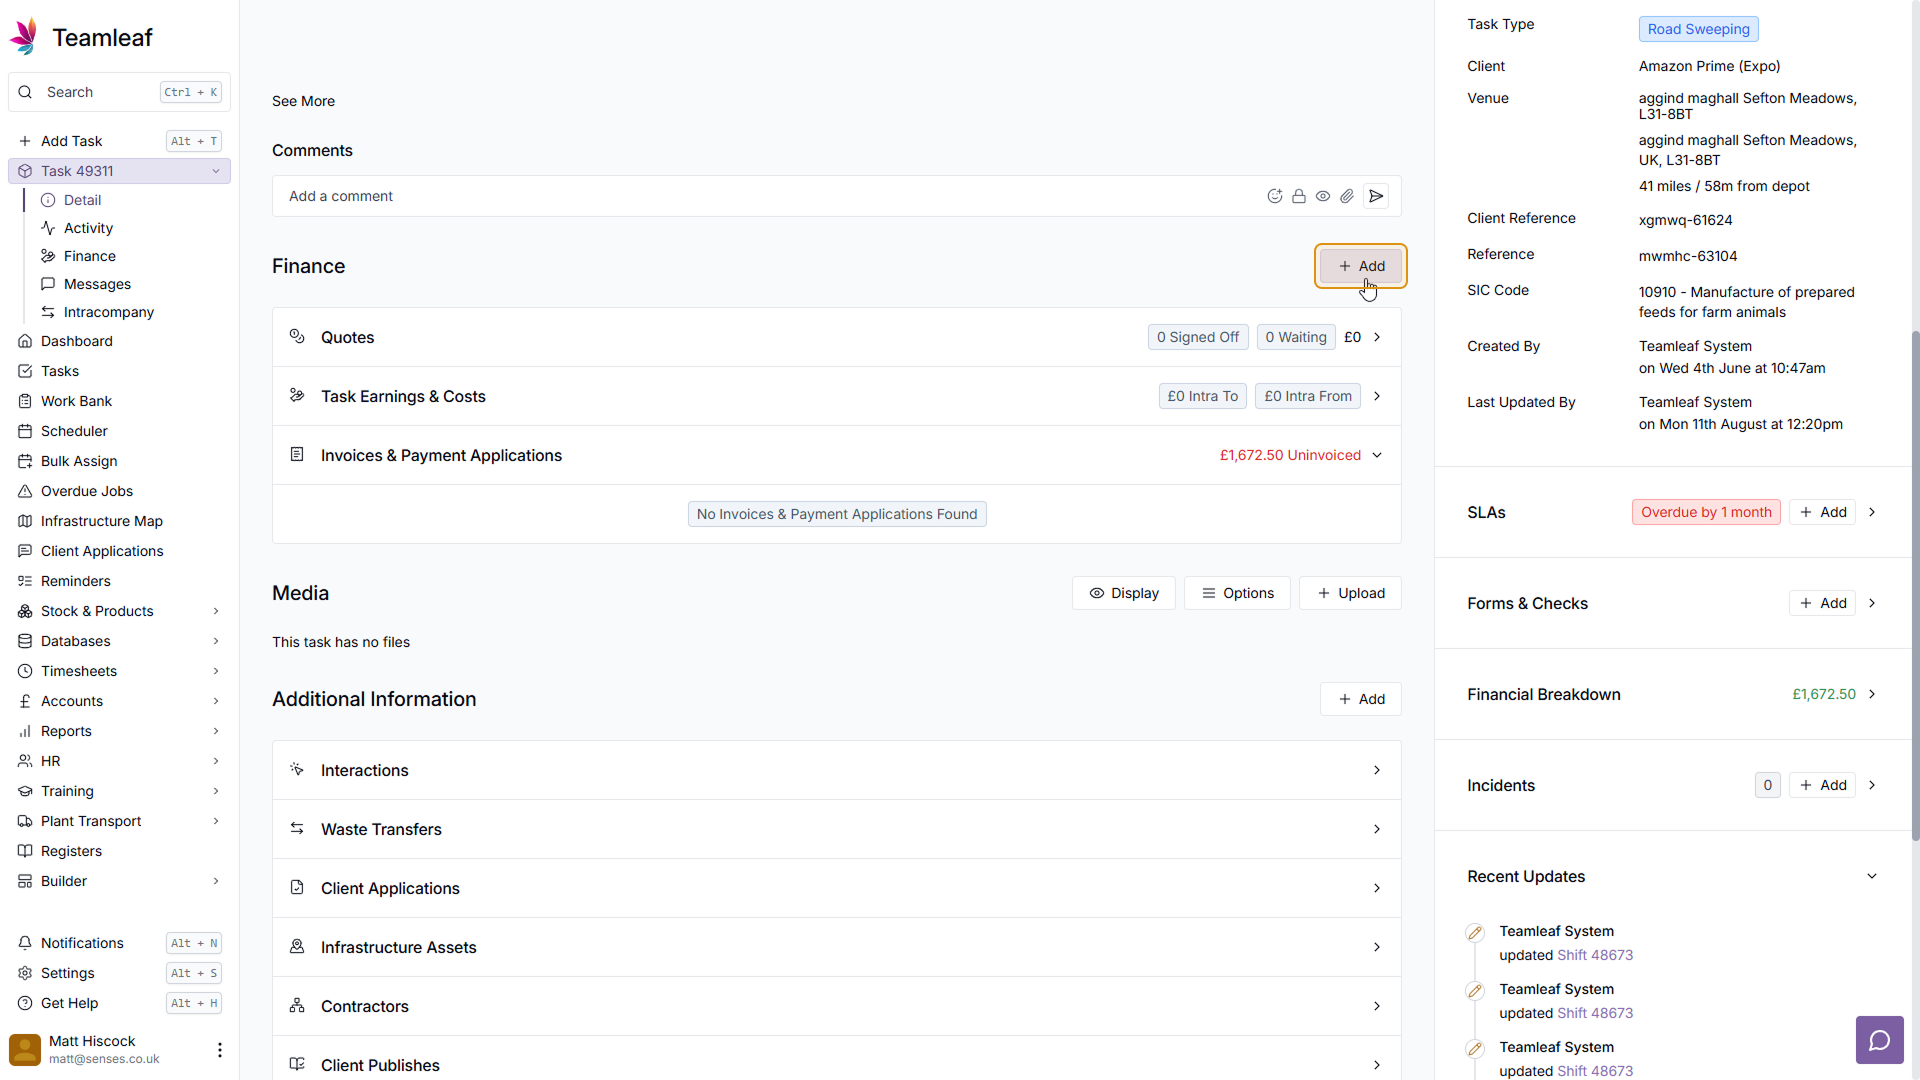
Add Invoice
To add an Invoice, click the 'Add' button in the top right of the Finance section, then click 'Add Invoice' in the dropdown menu that appears
Step 4
(Optional) Change Title
The invoice will automatically be given a title, which will just be the Task Title, if you wish, you can change this to whatever you want
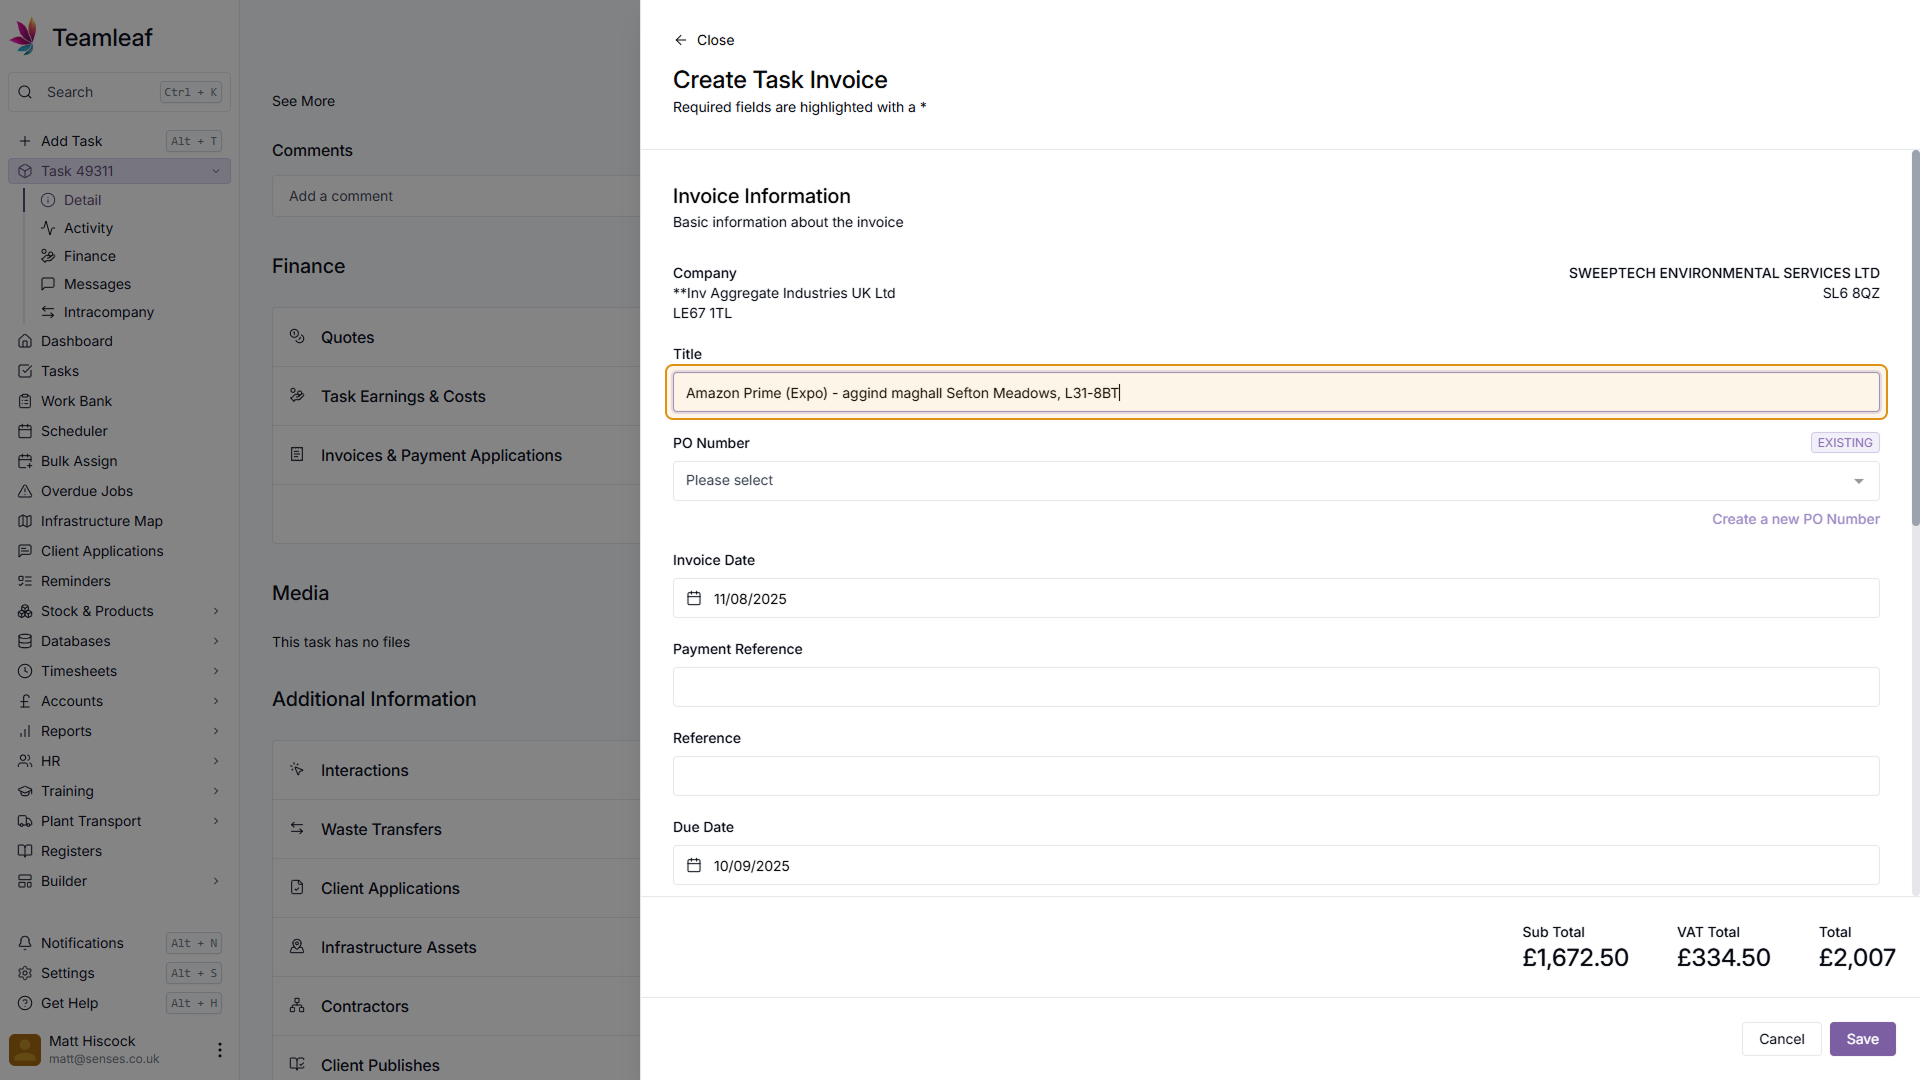
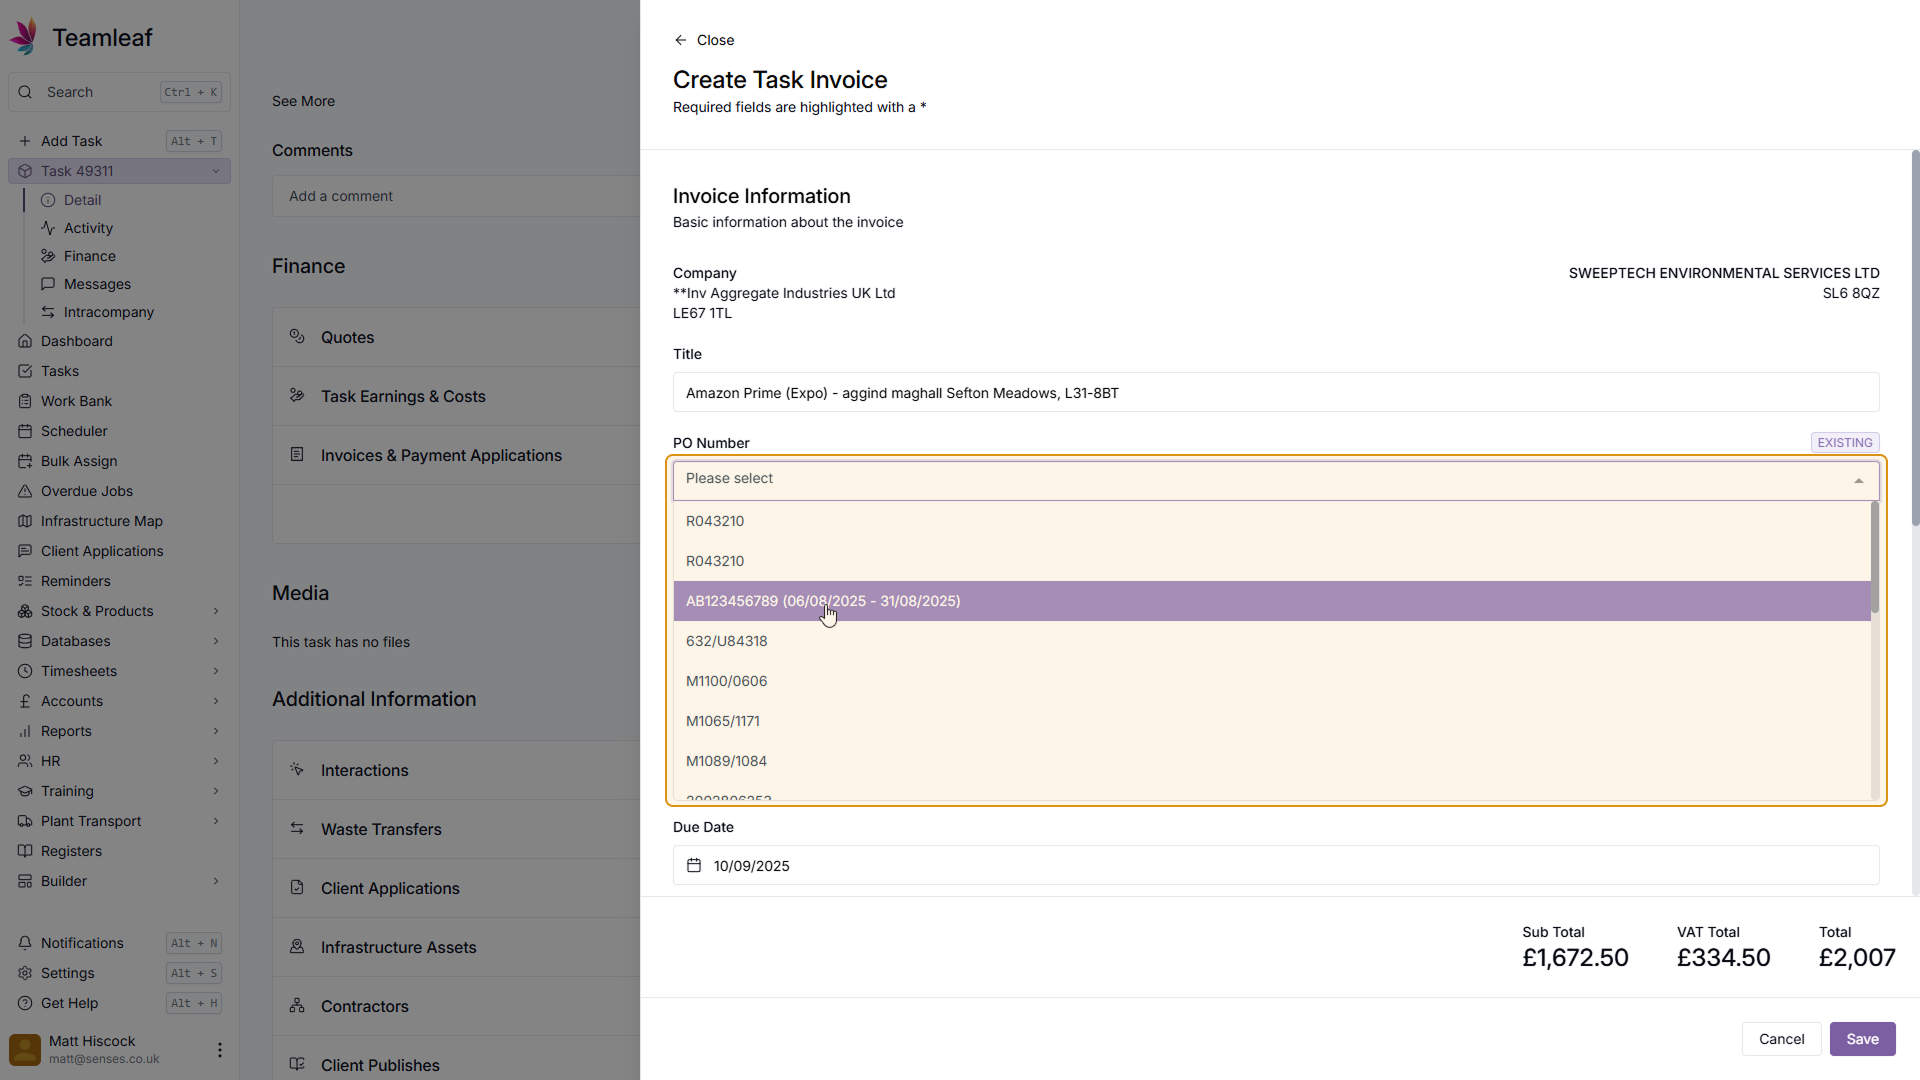
Step 5
Select PO Number
Next, select a PO Number from the dropdown menu, or create a new PO number

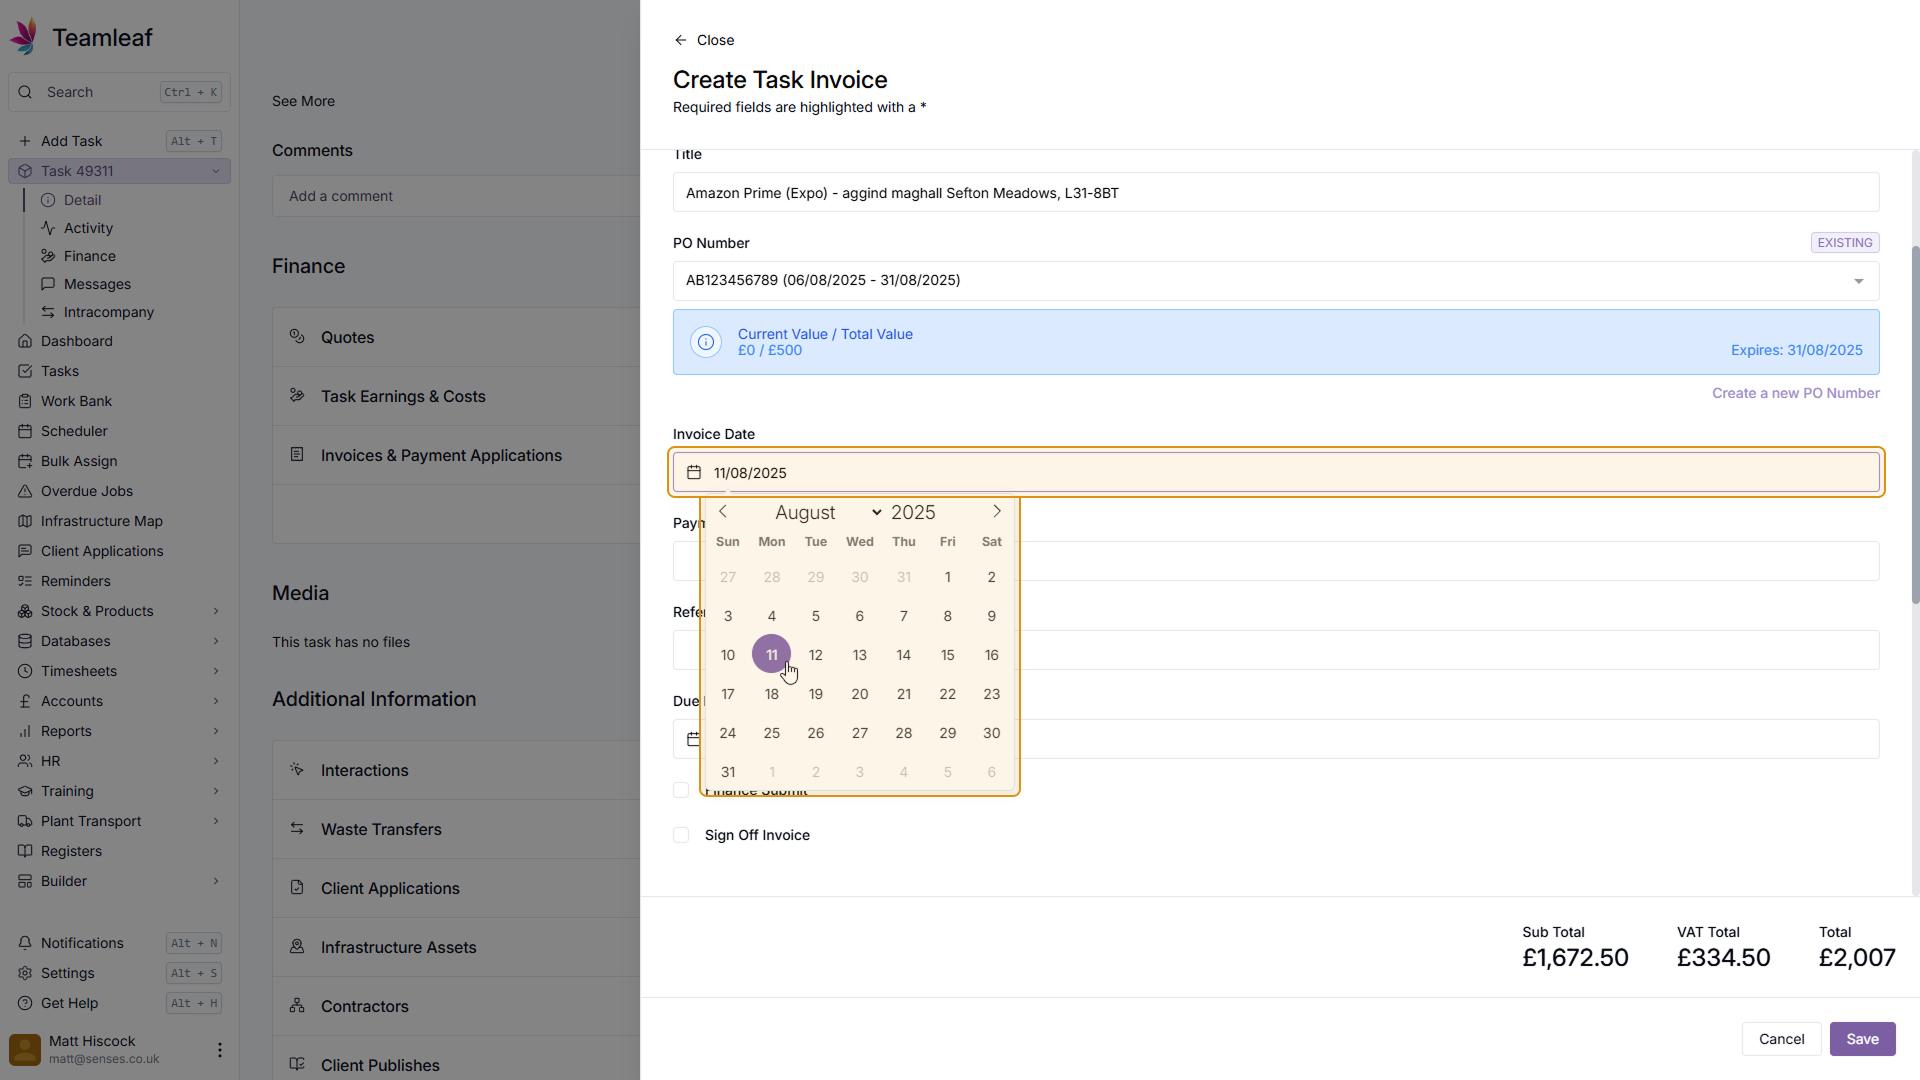
Step 6
(Optional) Change Invoice Date
By default, the invoice date will be today's date, if you wish you can click the Invoice Date field to change this.
Step 7
Add References
Next, add the Payment Reference and the Reference

Step 8
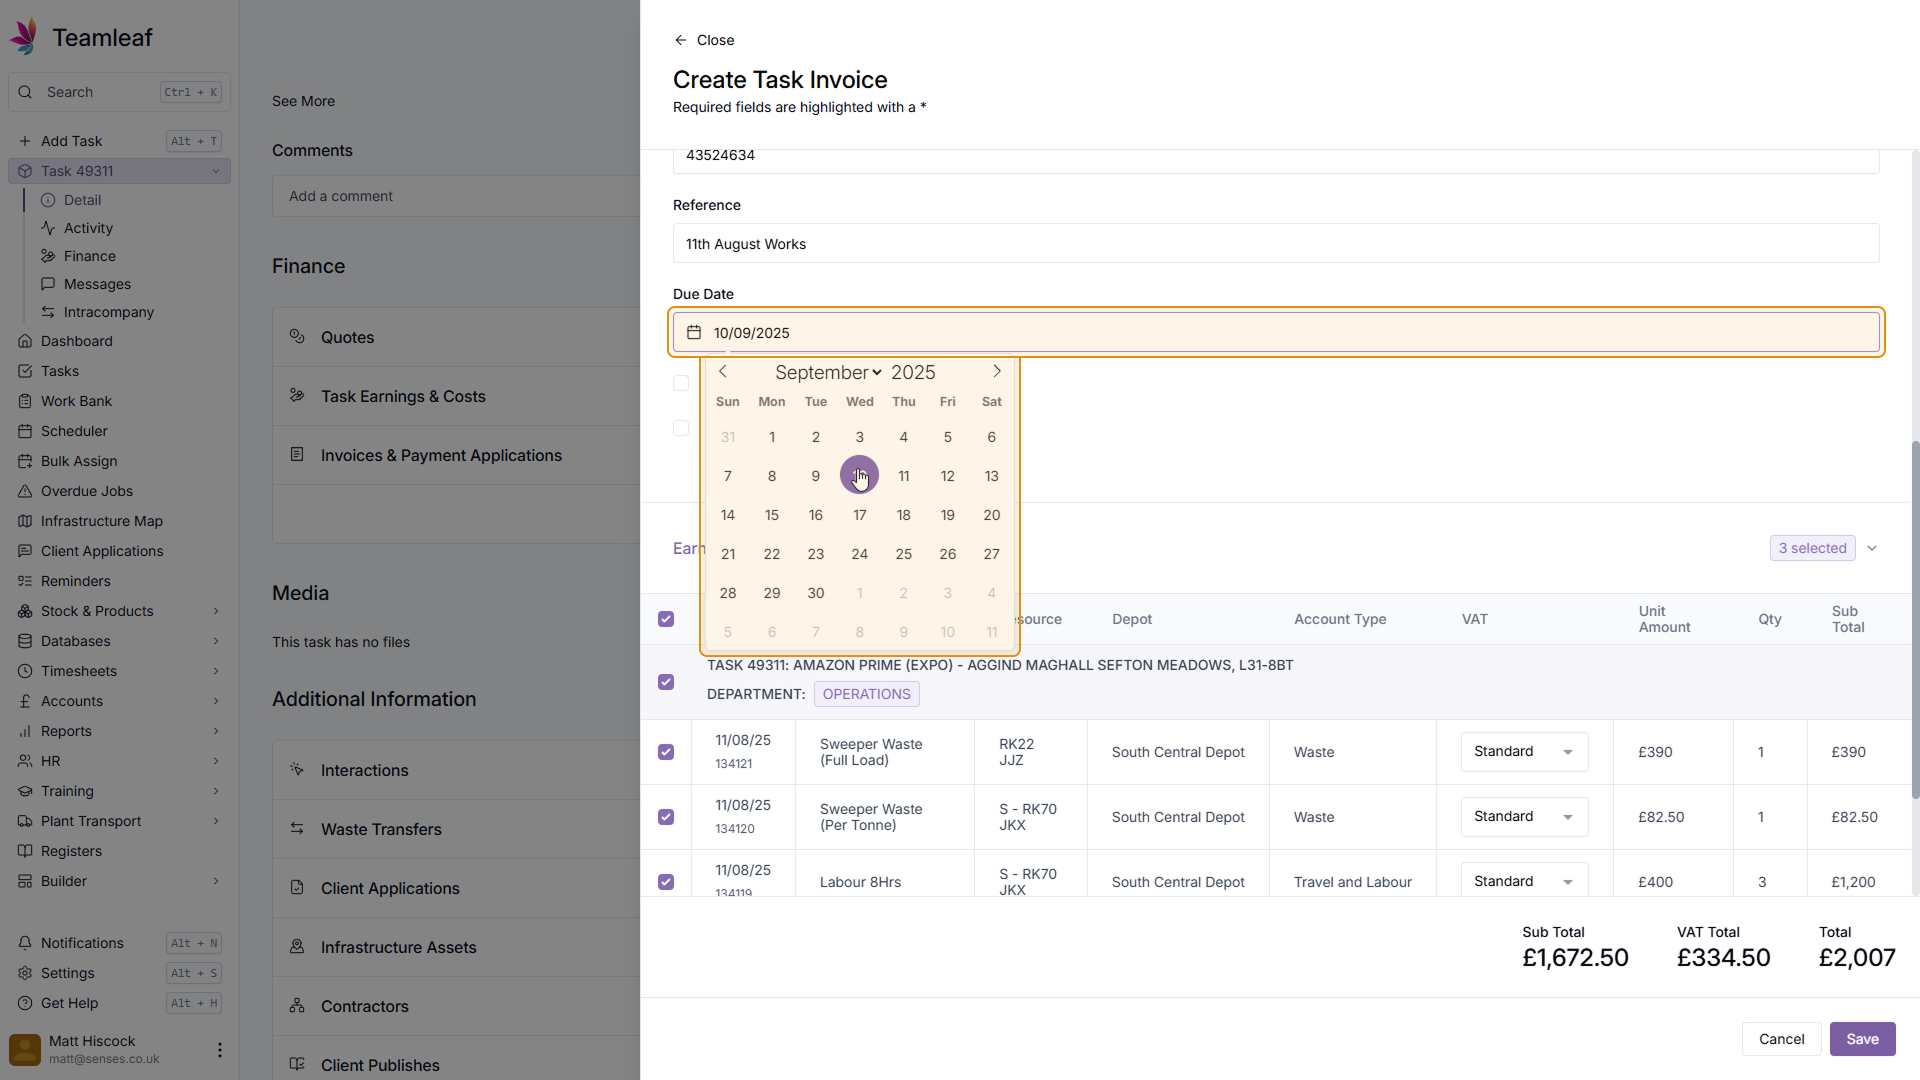
(Optional) Change Due Date
A due date of a month from the Invoice date will automatically be added, but if you wish you can change the Due Date manually
Step 9
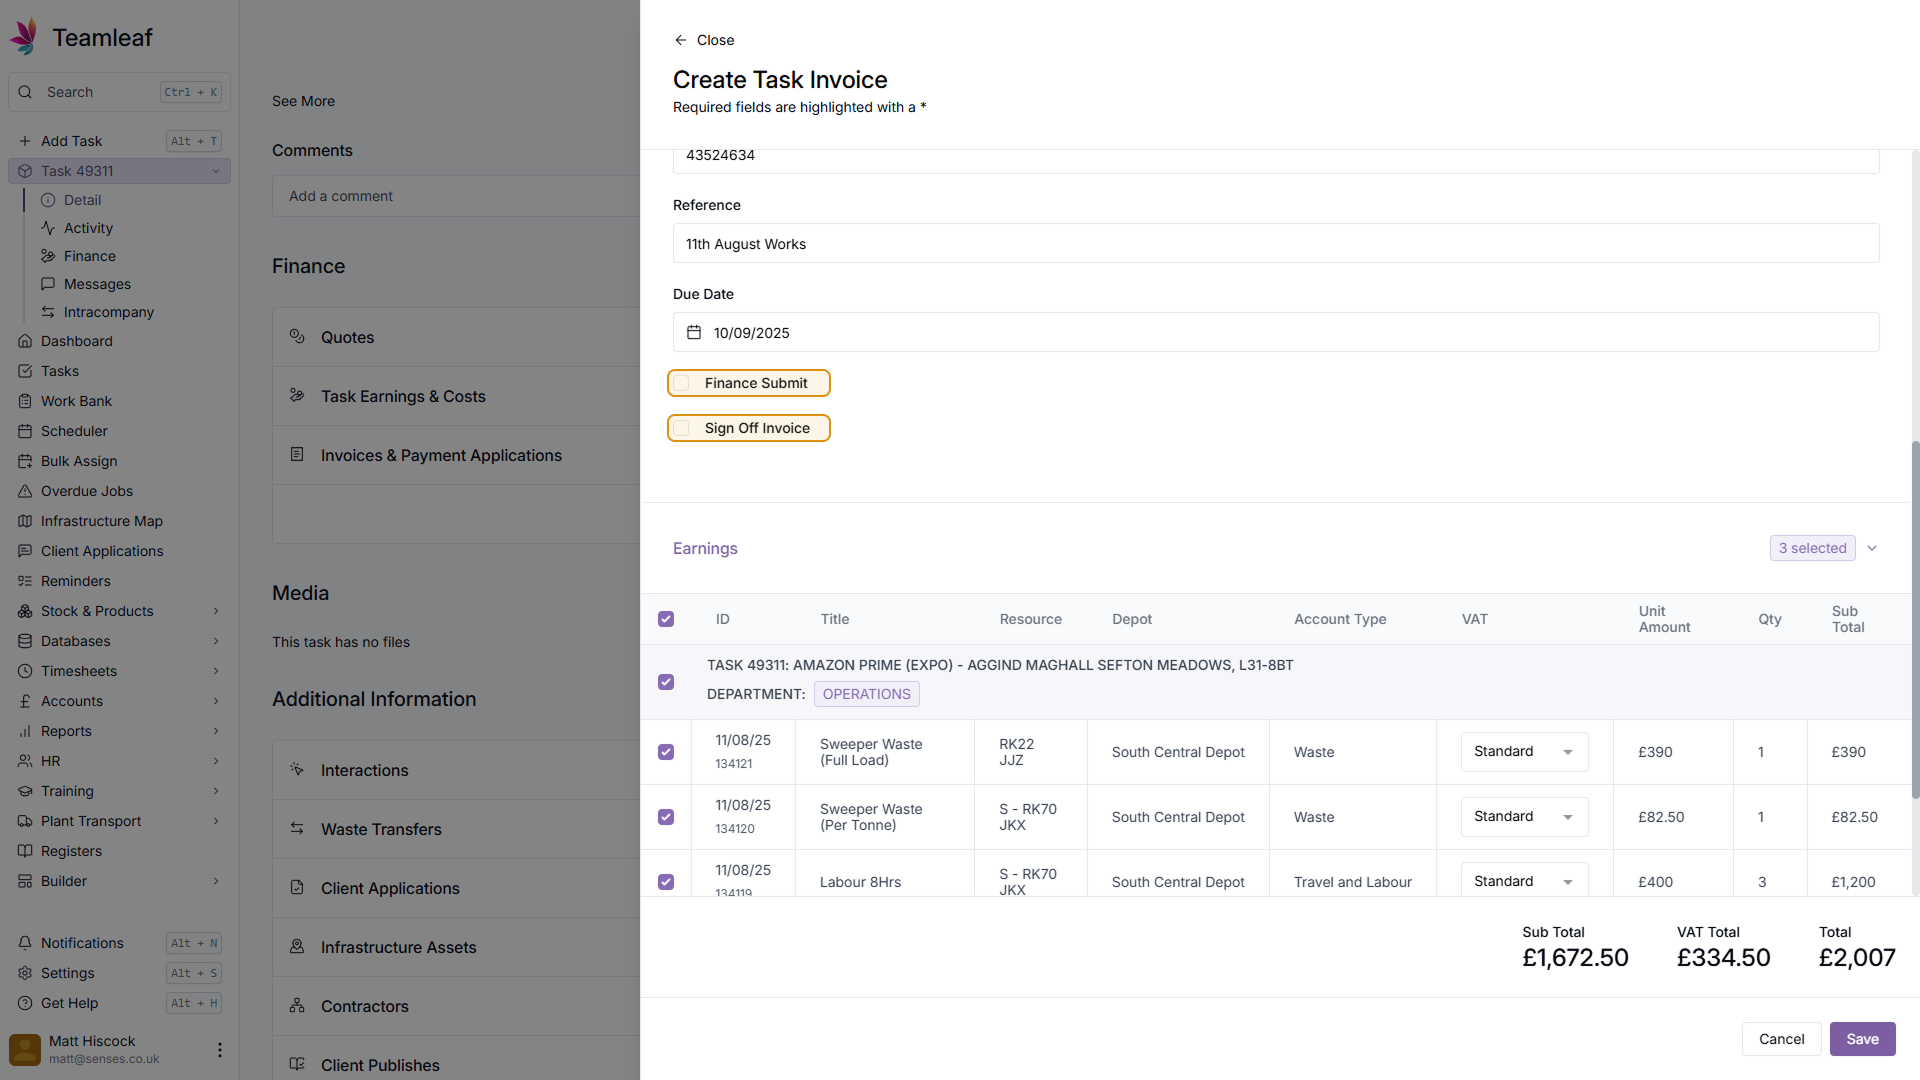
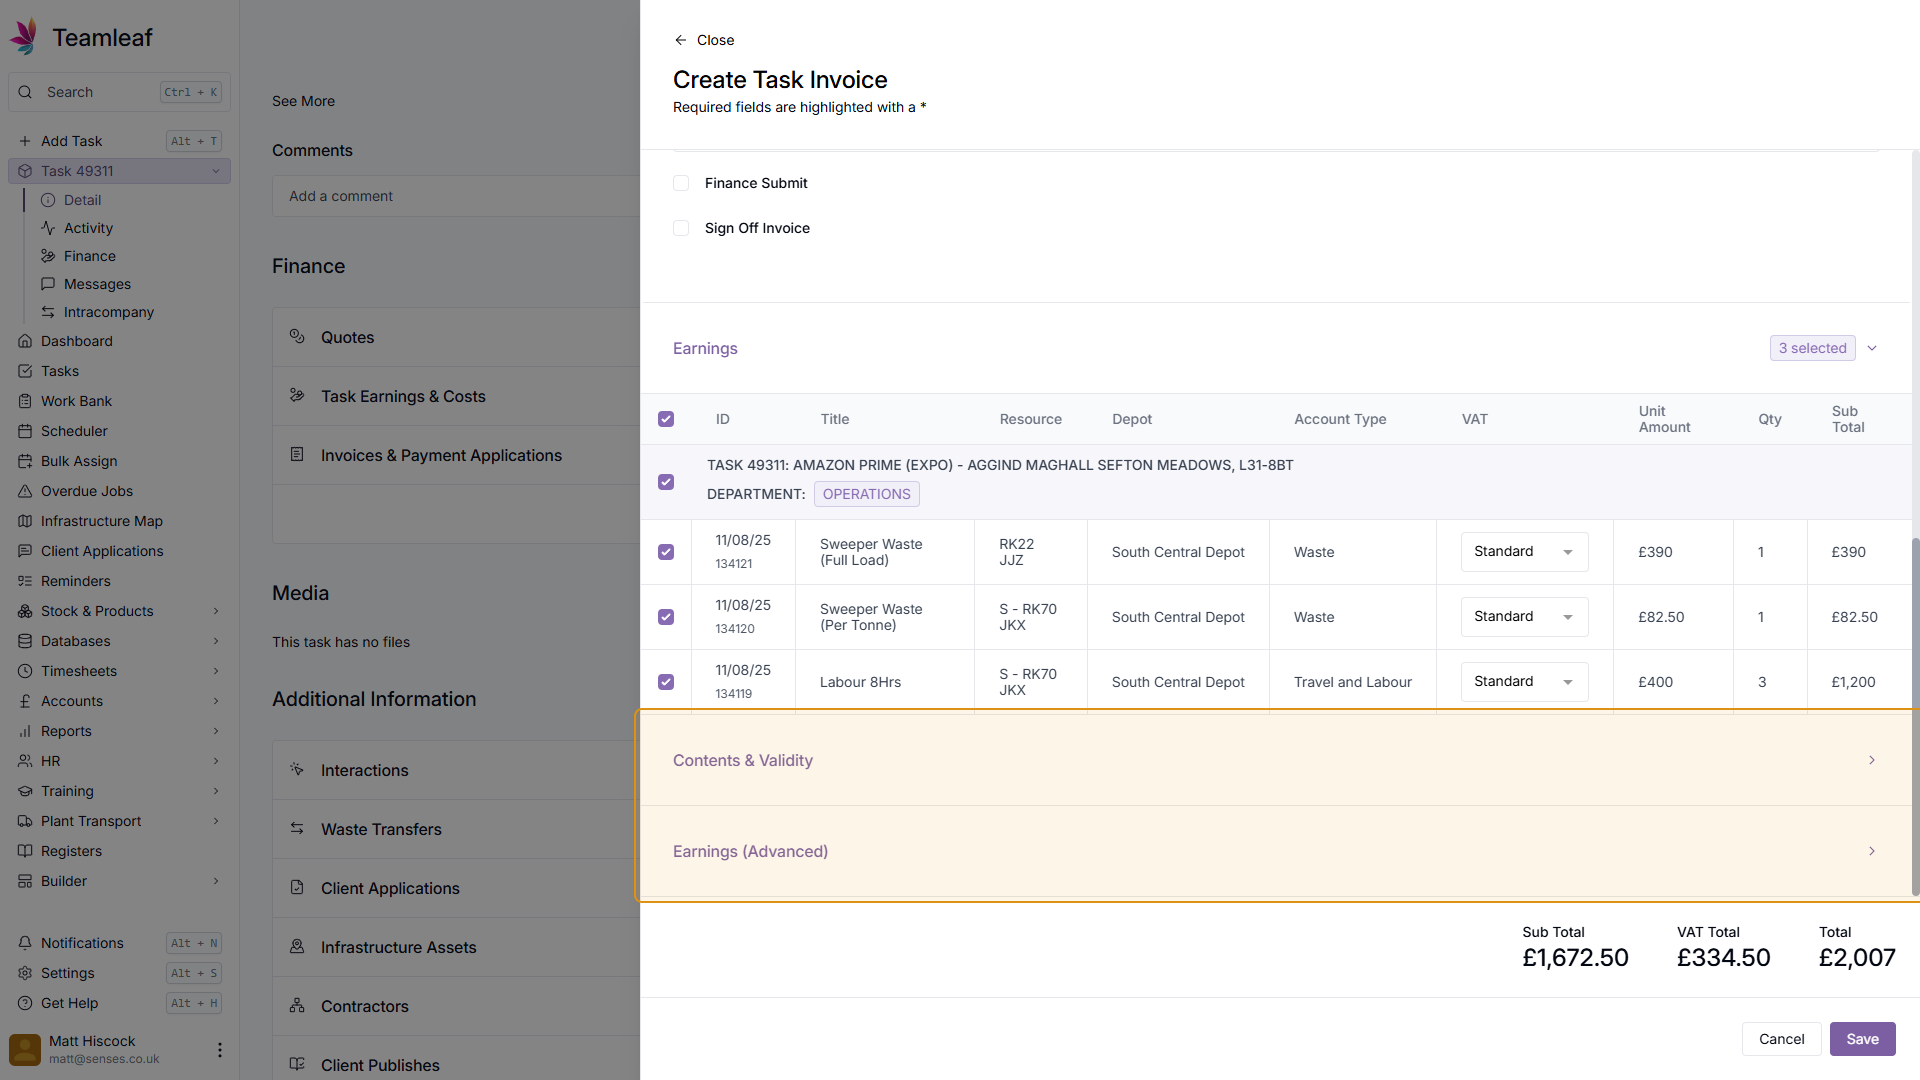
Finance Submit and Sign Off
If required, tick 'Finance Submit' and/or 'Sign Off Invoice'
Step 10
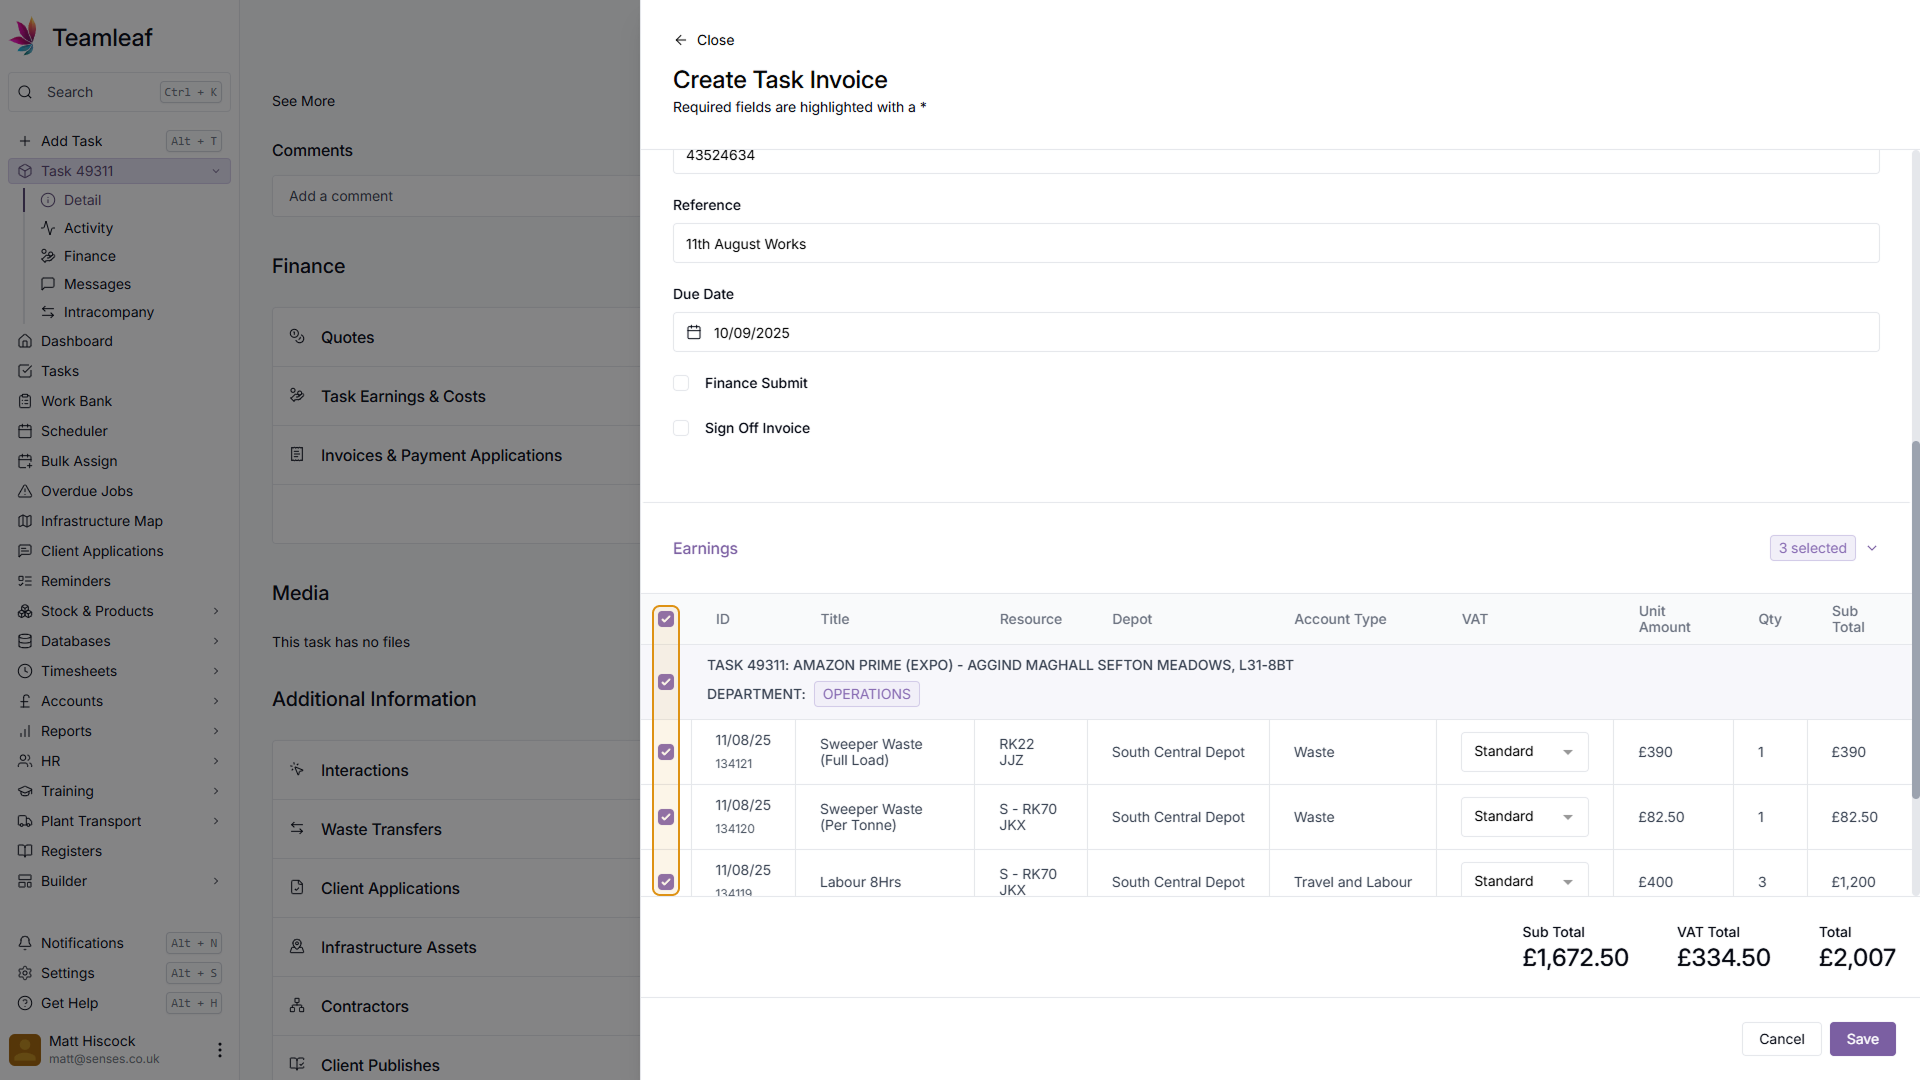
Select Earnings for Task
By default, all earnings will be added to the task, but you can select and deselect earnings by using the checkboxes to the left. The checkbox at the top will select/deselect all earnings, while the checkboxes beside individual earnings will select/deselect just those earnings
Step 11
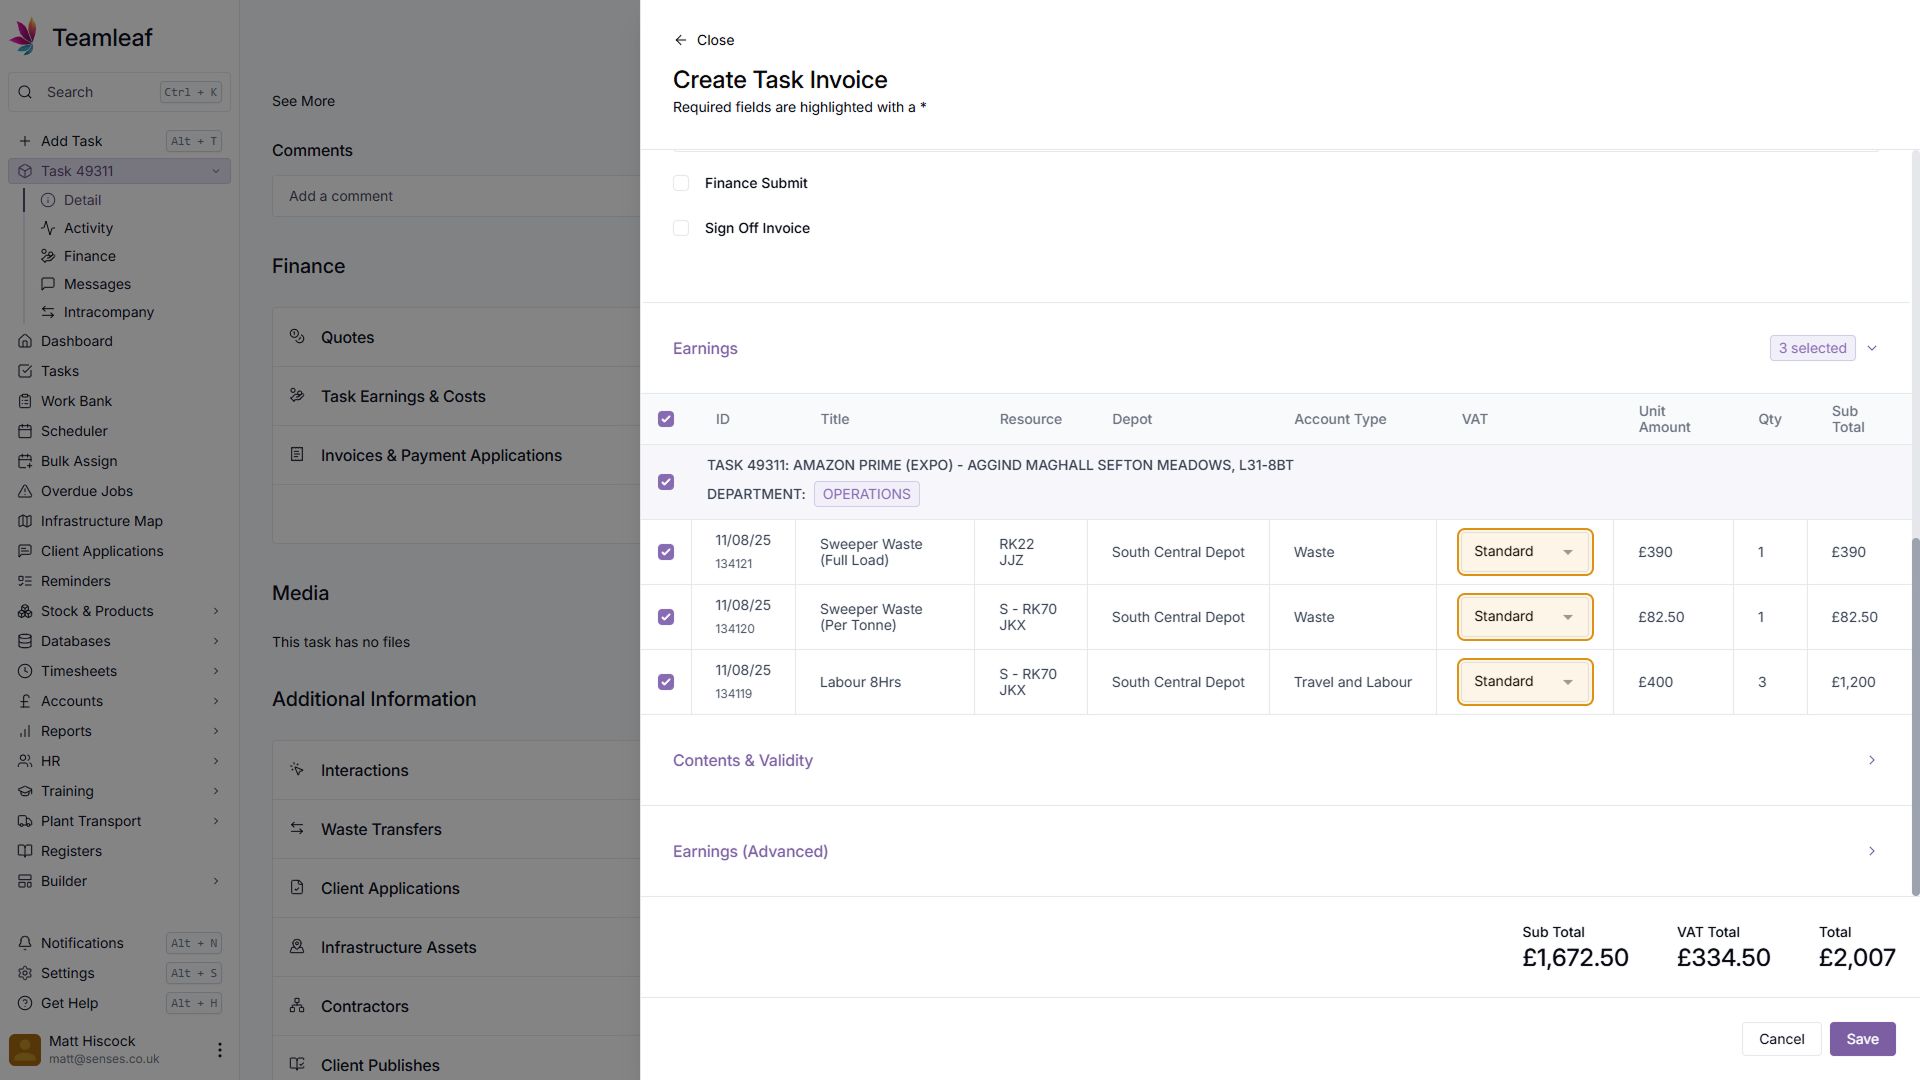
(Optional) Change VAT options
By default, standard 20% VAT will be applied to each of your earnings, but if required, you can click the dropdown menu in the VAT column to change them
Step 12
(Optional) Add to 'Contents & Validity' & 'Earnings (Advanced)'
If required, you can add additional detail to the invoice in the 'Contents & Validity' section, or include additional earnings in the 'Earnings (Advanced) section
Step 13
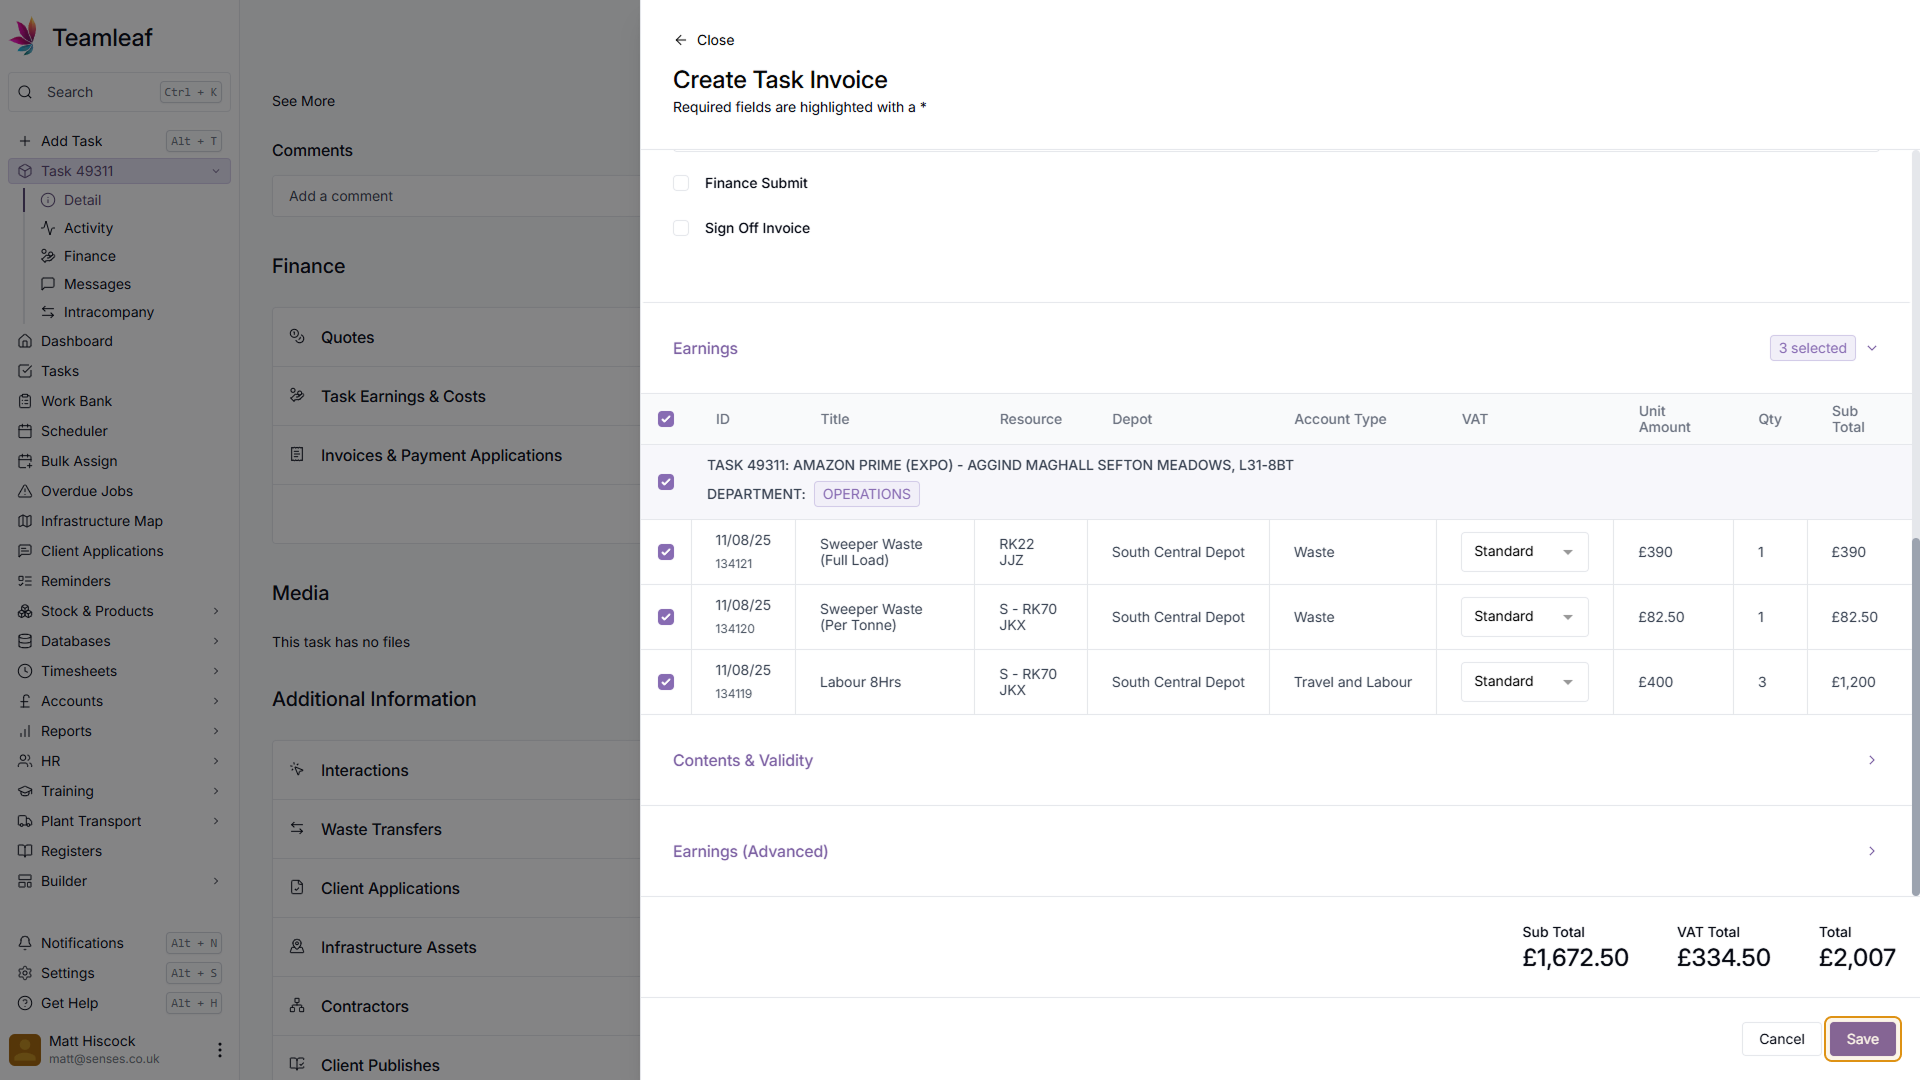
Click Save
To create your invoice, click the 'Save' button in the bottom right of the menu
Step 14
See your invoice
You have now created your invoice. You can find the invoice in the 'Invoices & Payment Applications' section, or find a CSV version under the 'Media' section
Related Courses
Intracompany
Invoicing
Scheduler
Shifts
Tasks
Drains Direct Essentials
Understand the Essentials for Drains Direct, Scheduling, Intracompany, Invoicing and more...
View Course
→
Intracompany
Invoicing
Scheduler
Shifts
Tasks
EVCSL Essentials
Understand the Essentials for EVCSL, Scheduling, Intracompany, Invoicing and more...
View Course
→
Intracompany
Invoicing
Scheduler
Shifts
Tasks
Lanes Group Essentials
Understand the Essentials for Lanes Group, Scheduling, Intracompany, Invoicing and more...
View Course
→
Related Tutorials
Finance
Invoicing
Adding a Credit Note
Learn how to add a Credit Note to a Task in Teamleaf
View Tutorials
→
Finance
Setup
Adding and Updating Rates
In this tutorial you will learn how to add new rates, and update existing rates.
View Tutorials
→
Finance
Quoting
Creating a Quote
In this tutorial you will learn how to create a basic quote in Teamleaf
View Tutorials
→